How to Block Senders in Outlook
Back To Online Support
This guide will show you how to block unwanted senders in Outlook
Option 1:
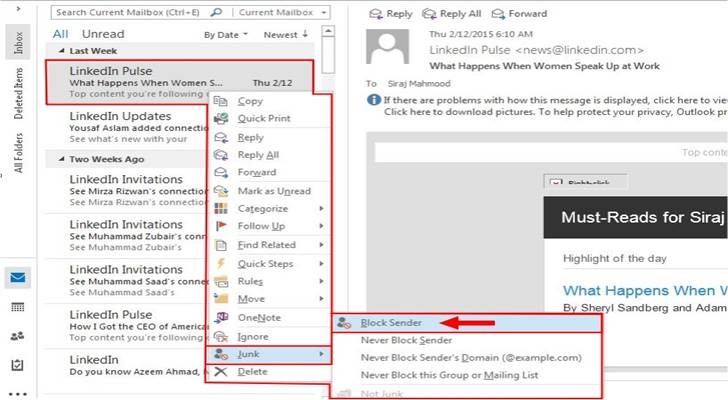
Right click on the email address that you no longer want to receive from. Select the JUNK option, then click on BLOCK SENDER this will block you from receiving unwanted email such as spam, newsletters that you don’t want and so on.
Please see screenshot below as an example:
Option 2:
On the Home Tab, select JUNK EMAIL OPTIONS. Click on the BLOCK SENDERS LIST.

Click on add and in the box type in the email address that you do not want to receive emails from and click on OK.
Please see illustration below:
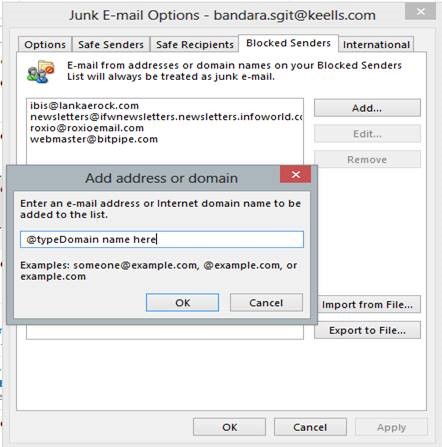
Once this is done click on APPLY and this will save what you have done.
Option 3:
Create a RULE:
Step 1:
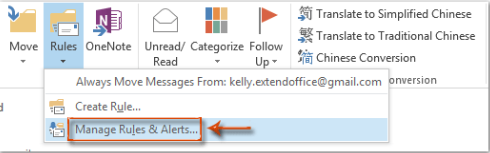
In Outlook on the Home tab please click the Rules > Manager Rules & Alerts.
Step 2:
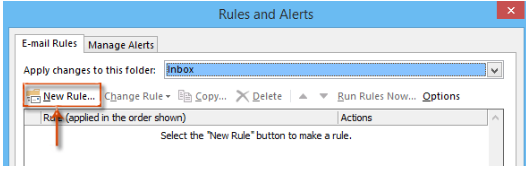
In the Rules and Alerts dialog box, please click the New Rule button.
Step 3:
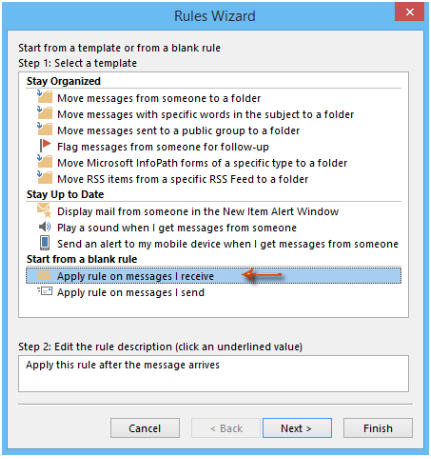
Now you get into the Rules Wizard dialog box. Click to highlight the Apply rule on messages I receive (or Check messages when they arrive in Outlook 2007), and then click the Next button.
Step 4:
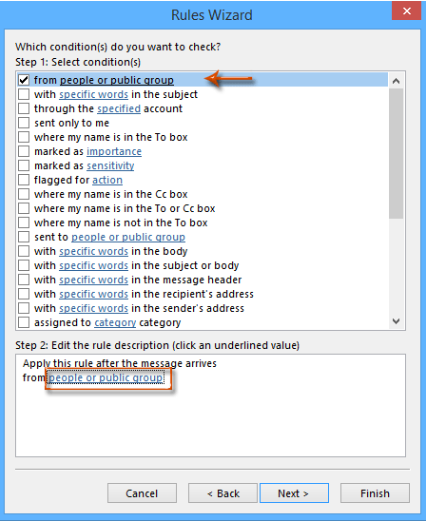
In the second Rules Wizard dialog box, check the from people or public group, and then click the text of people or public group.
Step 5:
Then the Rule Address dialog box comes out. Type the display names of senders whose email you want to filter or simply type the email address here into the from box, and click the OK button.
 Note:
Note:
- You can type the senders’ full display names, or just a certain keyword of it.
- Separate multiple display names of senders with semicolon (;).
Step 6:
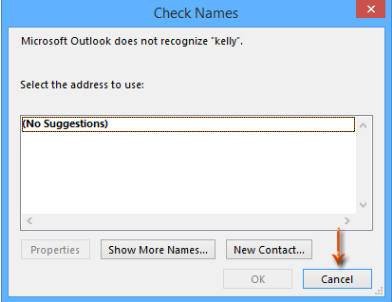
In the popping up Check Names dialog box, click the Cancel button.
Step 7:
Now you get back to the Rules Wizard dialog box, and click the Next button.
Step 8:
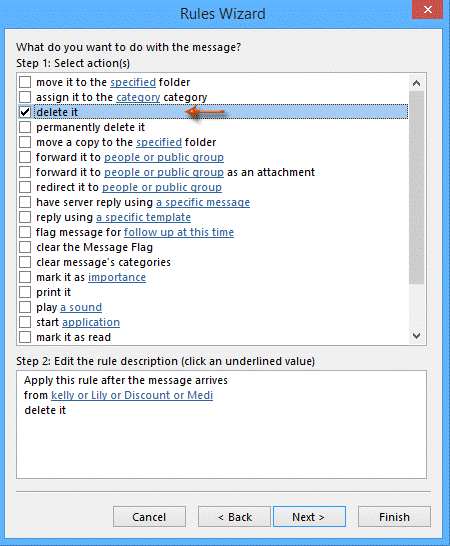
In the third Rules Wizard dialog box, check the delete it and click the Next button.
Step 9:
Click the Next button in the fourth Rules Wizard dialog box.
Step 10:
Now you get into the fifth Rules Wizard dialog box, type a name for this new rule in the box below Step 1: Specify a name for this rule, and click the Finish button.

Step 11:
Then it will return to the Rules and Alerts dialog box, please click OK button to complete the whole settings.
Note: It’s optional to check the option of Run this rule now on messages already in “Inbox”. If you check this option, it will filter and delete all existing email messages whose sender’ display names meet the condition you specified in Step 5..
Regards,
The iSAT Team
Back to top