Website MSSQL Configuration
Back To Online Support
Configuring MS SQL Databases on your Website
STEP 1a:
You will need to make sure that you have MS SQL Server 2005 Express Edition installed.
Create an instance of SQL Server called MSSQLHOSTING on you local machine. This instance
of SQL Server will hold you SQL database that you wish to use for your web site.
Make sure that your database is named the same as your domain name (e.g. if your domain is
mydomain.co.za then you database should be called mydomain.co.za)
STEP 1b:
This part is for developers wishing to save ASP.NET membership information
in the SQL Server database:
Go to C:\Windows\Microsoft.NET\Framework\v2.0.50727 (version number may vary) and run
aspnet_regsql.exe as an administrator.
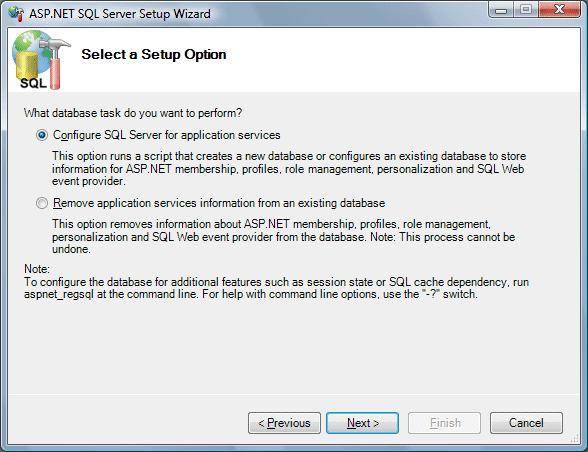
Click Next.
Leave Configure SQL Server for application services selected (by default) and click
Next.
Make sure that the Server is set to MSSQLHOSTING on your local machine
(i.e. ".\MSSQLHOSTING") and then select the Database (e.g. DomainName.co.za):
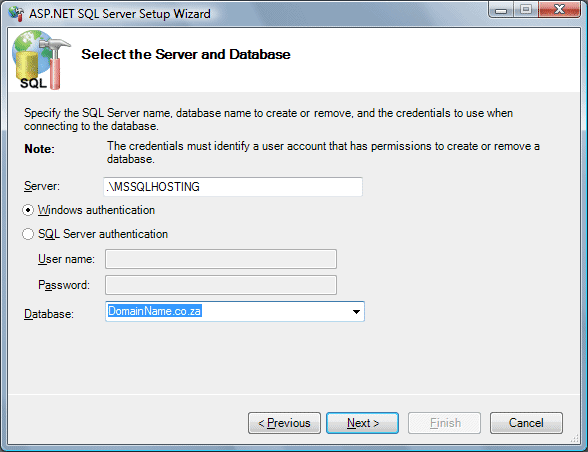
Click Next.
Click Next.
Click Finish.
You should see the following tables under the Tables folder in your newly created database.
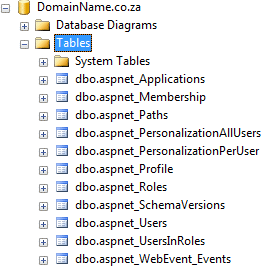
All you need to do now is set up your sqldatasource in the web.config file
to point to this database.
STEP 2:
The next step (once your database is complete) is to create a script file that will be run
later to publish you database onto iSATs' SQL Server.
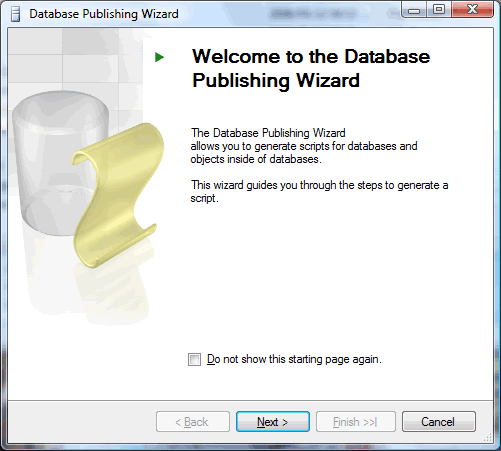
To do this, you will need to download and install the Database Publishing Wizard.
Download Here.
Once installed, you will run the publishing wizard (You will need to run it as an administrator
if your windows account does not have administrative rights).
You should see the following window:
Click Next.
You should then see the Select Source Server window:
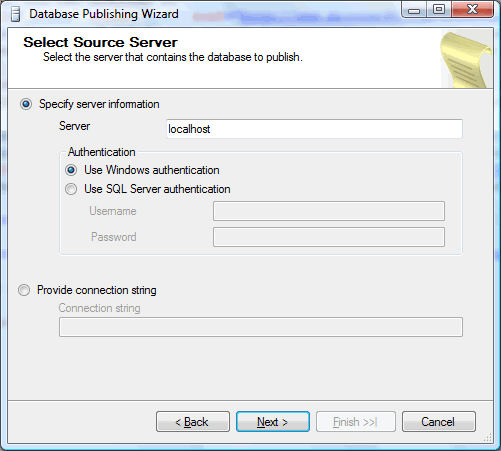
Set the server name to ".\MSSQLHOSTING".

Click Next.
You will be presented with the Select Database window:
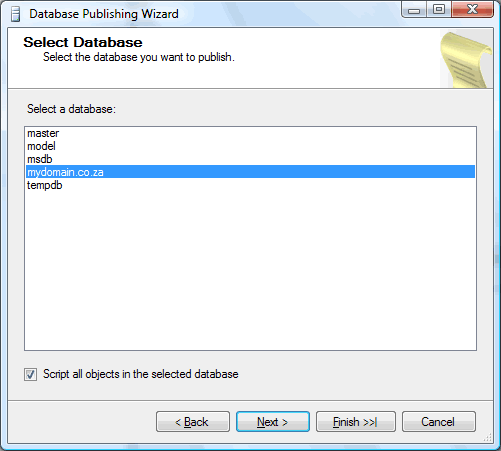
Select you database (e.g. mydomain.co.za) and click Next.
You should see the Select an Output Location window.
Leave it as Script to file and save the file name to a location of your choice:
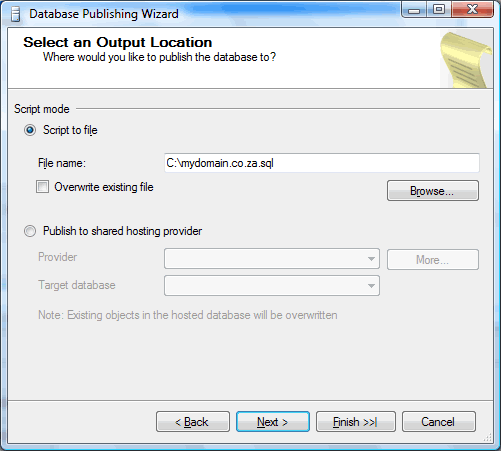
Click Next.
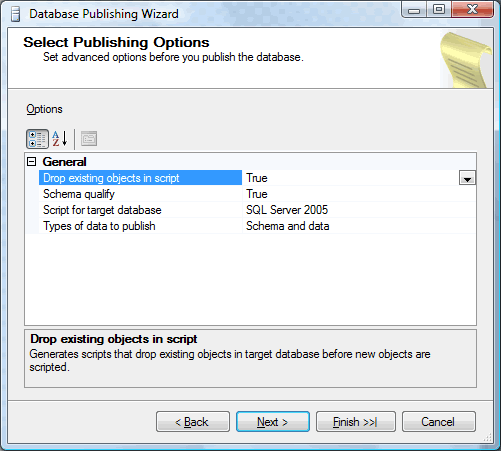
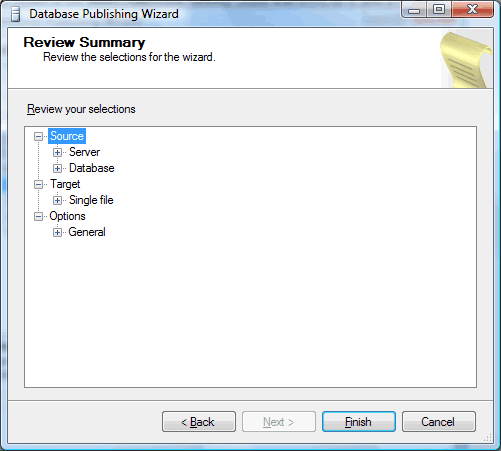
The next screen is the Select Publishing Options. Leave
everything as is and click Next:
Click Finish:
You will see the Database Publishing Progress window. If everything goes
correctly you should eventually see a screen like this:
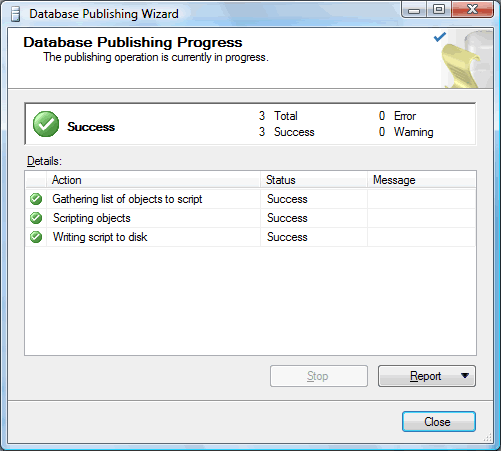
Click Close. You should now have a script file saved in the location you selected.
STEP 3:
The next step is to create an asp\aspx file which will run the SQL script
once the site has been published. Call this page "RunSQL"
Your aspx page should contain a button and a label:
<form id="form1" runat="server">
<div>
<asp:Button ID="Button1" runat="server" onclick="Button1_Click" Text="Button" />
<br />
<asp:Label ID="Status" runat="server" Text="Label"></asp:Label>
</div>
</form>
Then in your "RunSQL.aspx.cs" file place the code for Button1_Click event.
It should look similar to the following code (this example is in C# - please adjust accordingly).
using System;
using System.Collections;
using System.Configuration;
using System.Data;
using System.Linq;
using System.Web;
using System.Web.Security;
using System.Web.UI;
using System.Web.UI.HtmlControls;
using System.Web.UI.WebControls;
using System.Web.UI.WebControls.WebParts;
using System.Xml.Linq;
using System.Data.SqlClient;
using System.IO;
namespace mydomain.co.za
{
public partial class RunSQL : System.Web.UI.Page
{
protected void Page_Load(object sender, EventArgs e)
{
}
protected void Button1_Click(object sender, EventArgs e)
{
// Replace with your site details
string webSite = "mydomain.co.za";
// Your web site log in details go here:
string userName = "your user name";
string userPassword = "your password";
// Reference your script file created earlier here:
string sqlFileName = "mydomain.co.za.sql";
try
{
// Connection string to connect to your database
string connectionString = String.Format(
@"Data Source=.\MSSQLHOSTING;Initial Catalog={0};User ID={1};Password={2}",
webSite, userName, userPassword);
SqlConnection connection = new SqlConnection(connectionString);
connection.Open();
// SQL file must be in App_Data with BuildAction = Content
// File will be read and command executed for each go if file
StreamReader streamReader = new StreamReader(Page.MapPath(String.Format("~/App_Data/{0}", sqlFileName)));
String sql = "";
while (!streamReader.EndOfStream)
{
sql = "";
// Read file until find a Go and then Execute
while (!streamReader.EndOfStream)
{
string line = streamReader.ReadLine();
if (!String.Equals(line, "Go", StringComparison.CurrentCultureIgnoreCase))
{
if (sql != String.Empty) sql += Environment.NewLine;
sql += line;
}
else
{
SqlCommand cmdDB = new SqlCommand(sql, connection);
cmdDB.ExecuteNonQuery();
break;
}
}
}
Status.Text = "Done";
}
catch (Exception ex)
{
Status.Text = "Error: " + ex.Message;
}
}
}
}
STEP 4:
Publish your site. Go to www.yourdomain.co.za/RunSQL.aspx.
Click the button. The label should reflect whether your script ran successfully or not.
Your database should be fully set up on iSATs' MS SQL Server!
PLEASE NOTE:
If you click on the button a second time it will run the script again,
thus overwriting you tables. Potentially this means that you could lose any data saved since you
first ran the script. As a safety precaution, we recommend that you delete the RunSQL
file after successfully creating the database tables.
Back to top