How to FTP using FileZilla
Back To Online Support
This guide will show you how to FTP / Publish your website using FileZilla
Step 1:
Open FileZilla
From here there are 2 ways you can FTP your website files. If you have many FTP sites, you will want to keep them organized by using the Site Manager. If you're only managing one site, use the Quickconnect
For Quickconnect go to Step 2 and for Site Manager go to Step 4.
Step 2:
At the top of the screen you will see input boxes: Host, Username, Password and Port. Enter the information as provided for by your Internet Service Provider (ISP). See example below.

Format example:
Host:
www.example.co.za – (your website address)
Username:
www.example.co.za|isa005-ws1 – (website address|username)
Port:
(default FTP port 21 when left blank)
Step 3:
Click Quickconnect. This will connect you to your website where you can upload your files. go to Step 9 to continue.
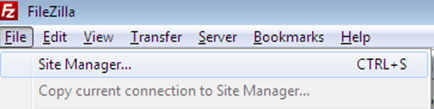
Step 4:
Click the File menu and select File Manager.
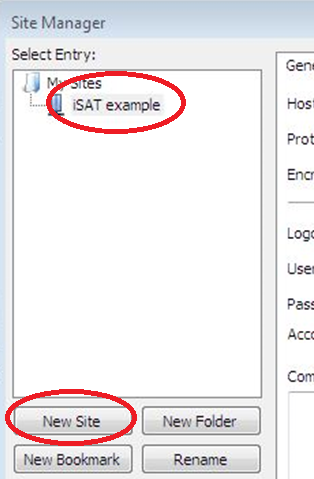
Step 5:
Click New Site on the Site Manager Window. This will create a new FTP site connection, which you can Name, e.g. iSAT Example
Step 6:
Enter your FTP details in the relevant spaces under the General Tab. This information you will get from your Internet Service Provider (ISP). See example below.
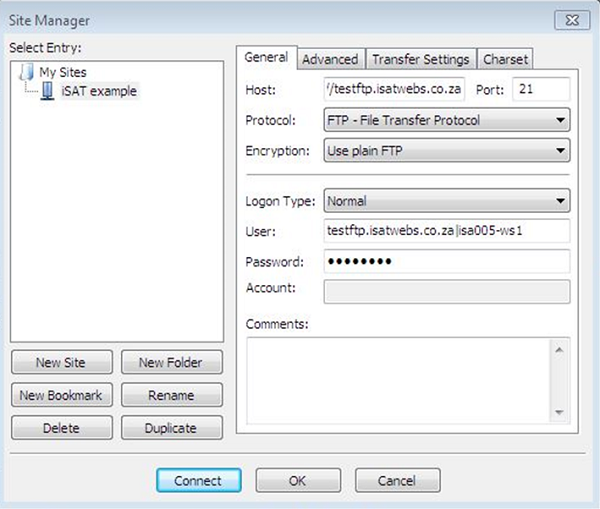
Step 7:
Click OK to save your details. Repeat Step 4 to 7 for all your other domains that you are managing.
Step 8:
Once you have created all your Site Entries, you can access them by following Step 4. From there, select the Site you want to connect to and click Connect.
This will connect you to your website where you can upload your files. Go to Step 9 to continue.
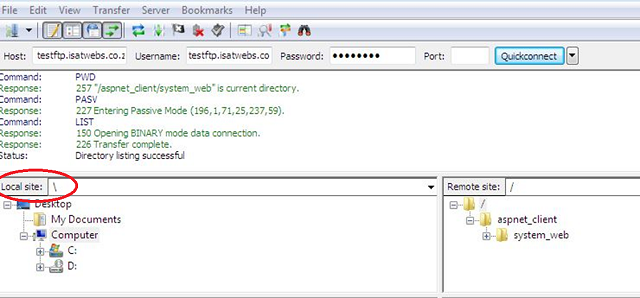
Step 9:
Once you are connected, you will see two window panes, Local site and Remote site.
Local site is your computer and Remote site is your live website.
Navigate to the files(s) that you wish to upload via the Local site window pane.
Step 10:
In the Remote site window pane, select the folder you want to upload the files to. Make sure you have opened that folder by double clicking it.
Please note, if it is the initial website upload (i.e. first time uploading website), the files/folders should be uploaded directly to the root folder (/).
Step 11:
Select the files(s) to be uploaded in the Local site window pane.
Step 12:
Right Click your selected file(s) and select Upload. Or drag-and-drop then from Local site to the folder under Remote site.
This will upload the file(s) to your website
Should you need assistance to FTP your website using FileZilla, please feel free to contact our Support Team on 010 555 0650.
Regards,
The iSAT Team
Back to top