VDSL/ADSL Setup (TP-Link AC-1600 VDSL/ADSL Router)
Back To Online Support
 TP-Link AC-1600 VDSL/ADSL Router
How to setup a TP-Link AC-1600 VDSL/ADSL Router
This guide will show you how to setup your TP-Link AC-1600 Router. The basic setup is the same for most ADSL Routers, however may vary slightly for each model.
Step 1:
Obtain your Default Gateway (for more information, Click here for Windows or Click here for Mac OS)
Step 2:
Open your Internet Browser, such as Internet Explorer, Google Chrome, etc...
Step 3:
Enter your Default Gateway in the address bar of your Internet Browser and press Enter.
Step 4:
This will then display a Pop-Up Window to enter your Router Username and Password (see below image). The default factory settings for the username and password should both be “Admin”.
Step 5:
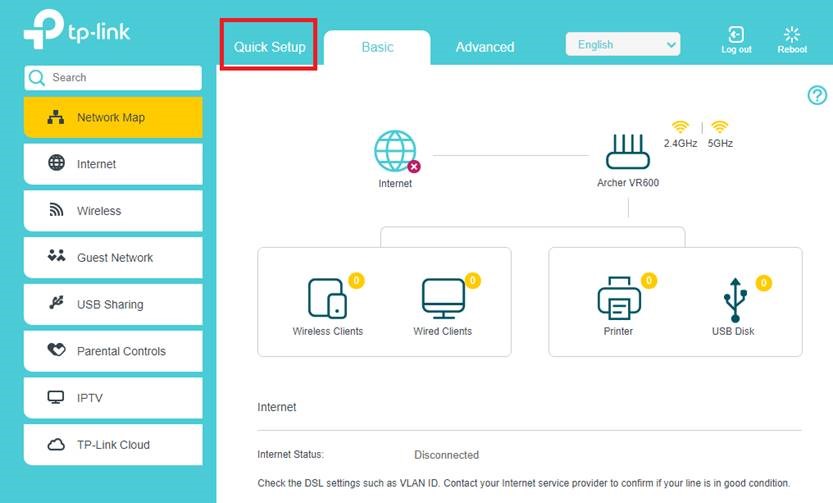
The below should appear. Click Quick Setup.
Step 6:
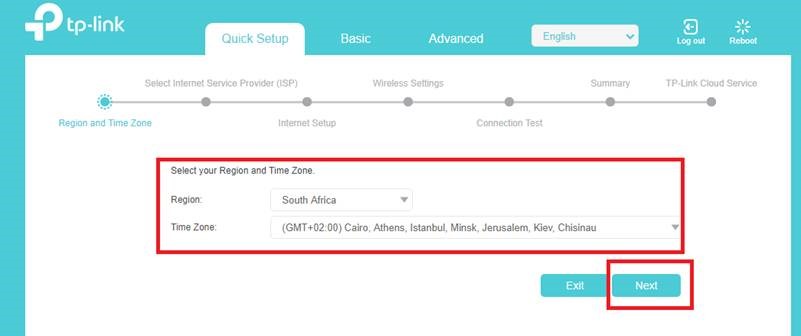
Set time and date accordingly and click Next.
Step 7:
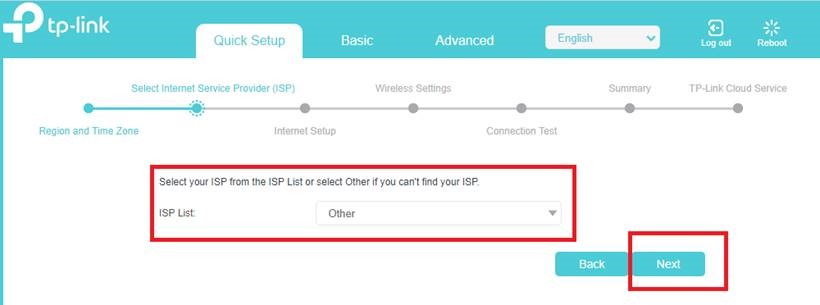
Select “Other” and click Next.
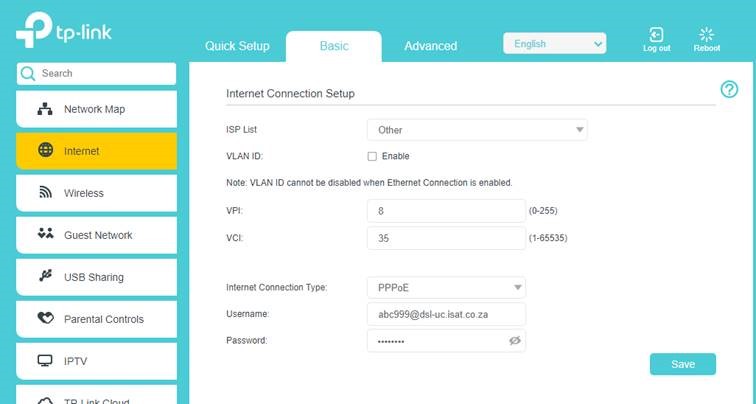
Step 8:
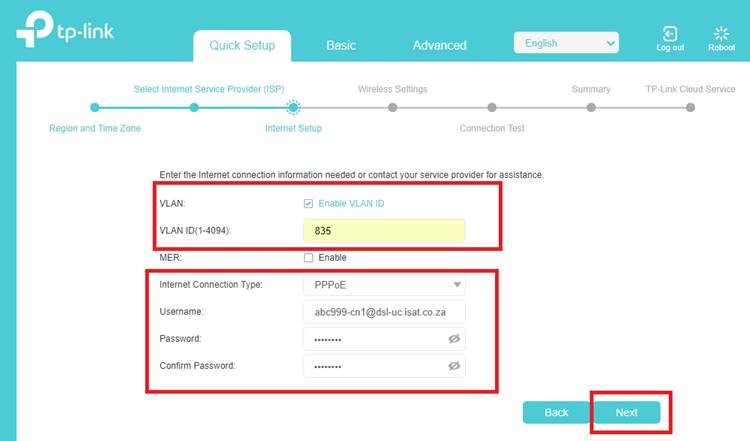
If your ADSL line is VDSL i.e. 40Mbps please Enable VLAN and VLAN ID should be “835”
In the Username and Password field, input the Connection Username and Password that was provided by your ISP. And click Next
Step 9:
If your ADSL line is not VDSL i.e. 1MBps, 2Mbps, 4Mbps, 8Mbps, 10Mbps and (20Mbps).
Do not enable VLAN ID.
Enter the values in the VPI and VCI as shown below.
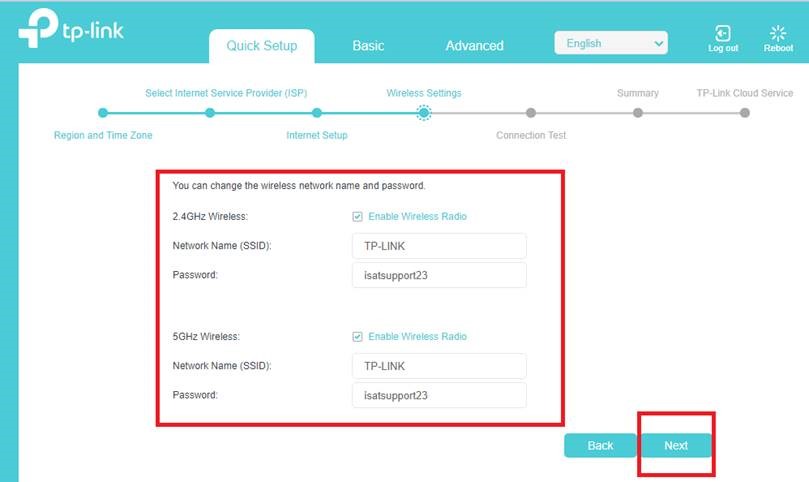
Step 10:
The Wireless Settings window opens.
Set your Wireless Network Name (SSID) e.g. Joe’s Home
Set your Wireless Password (8 -64 hexadecimal characters) and click Next
Step 11:
The router will now test your internet connection with the settings you have entered.
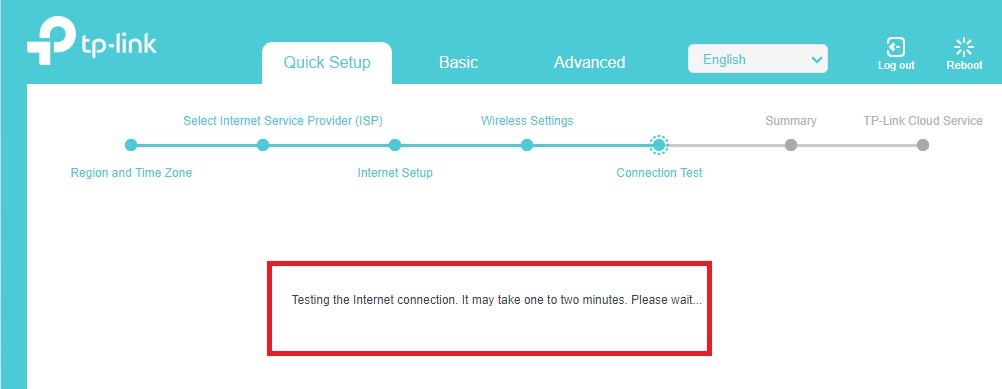
Once the test is complete the setup will return to the home page.
Should you need assistance setting up you TP-Link AC-1600 Router, please feel free to call us on 010 555 0650.
Regards,
The iSAT Team
Back to top