ADSL Setup (TP-Link TD-W8968 Router)
Back To Online Support
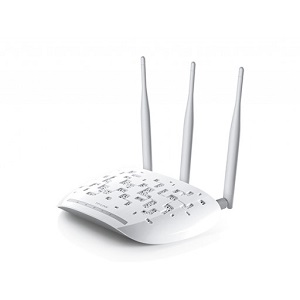 TP-Link TD-W8969 Router
How to setup a TP-Link TD-W8968 Router
This guide will show you how to setup your TP-Link TD-W8968 Router. The basic setup is the same for most ADSL Routers, however may vary slightly for each model.
Step 1:
Obtain your Default Gateway (for more information, Click here for Windows or Click here for Mac OS)
Step 2:
Open your Internet Browser, such as Internet Explorer, Google Chrome, etc...
Step 3:
Enter your Default Gateway in the address bar of your Internet Browser and press Enter.
Step 4:
This will then display a Pop-Up Window to enter your Router Username and Password (see below image). The default factory settings for the username and password should both be “Admin”.

Step 5:
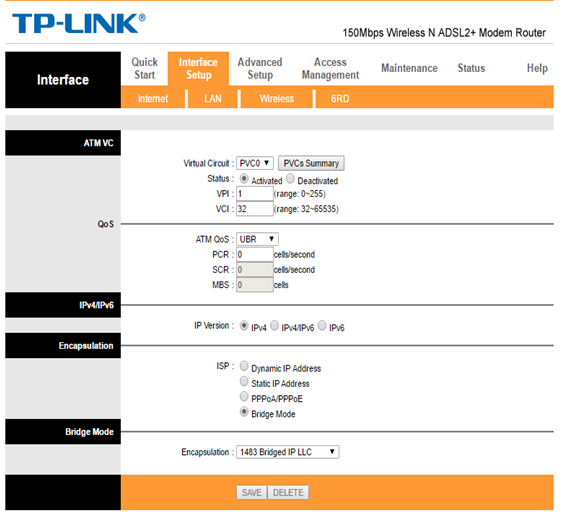
When you get to this page select Interface Setup:
Step 6:
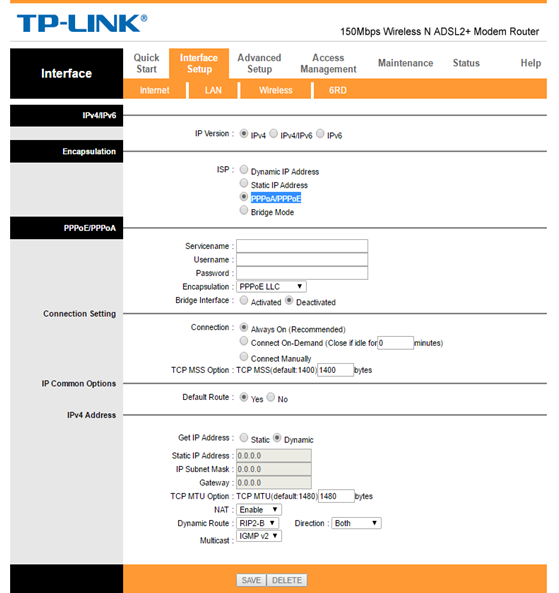
Change the encapsulation mode to PPPoA/PPPoE:
Step 7:
In the Username and Password field, input the Connection Username and Password that was provided by your ISP.
Step 8:
Save when all the information is correct.
Step 9:
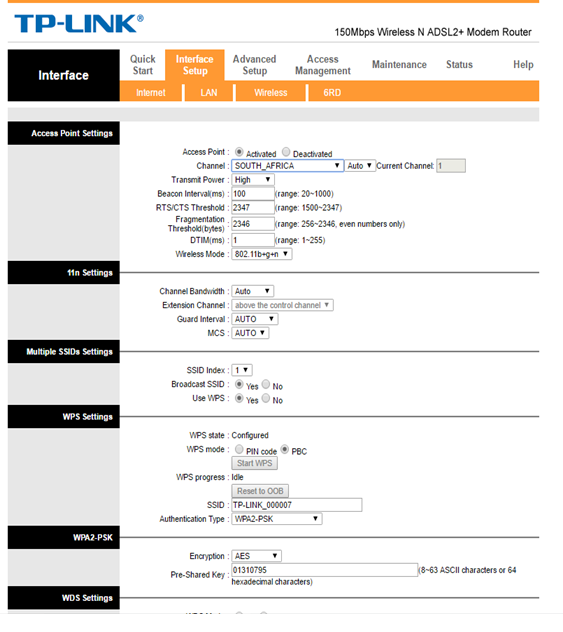
The next step is configuring your Wi-Fi settings (wireless) as seen in image below.
- If you do not want to use the wireless feature on your Router, click on deactivate checkbox.
- If you do want to use the wireless feature, ensure that the activated checkbox is checked.
Step 10:
Enter your SSID. The SSID is the name that you want your wireless network to be called.
Step 11:
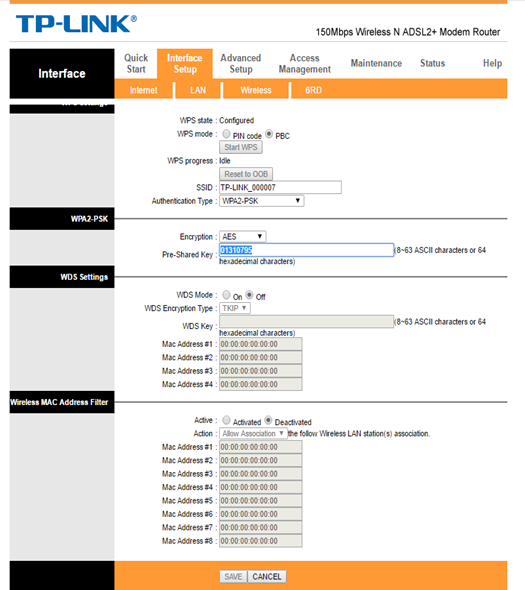
The following step is for your Wireless Security setting. It is advisable to have a password on your wireless feature. Should you not want a Secure Wireless Setup, select None for the Security mode.
Step 12
Select WPA/WPA2 if you want your wireless network password protected. Enter the Password you want in the space provided next to Pre-Shared Key:
Step 13:
Once you are sure that all settings are correct, click Save
Your router might restart after it has saved the configuration.
Should you need assistance setting up you TP-Link TD-W8968 Router, please feel free to call us on 010 555 0650.
Regards,
The iSAT Team
Back to top