How to Setup a Yealink SIP-T20P IP Phone
Back To Online Support
 Yealink SIP-T20P IP Phone
How to setup a Yealink IP Phone
This guide will show you how to setup your Yealink IP Phone.
Step 1:
Obtain you Default Gateway (for more information, see How to obtain your Default Gateway)
Step 2:
Open your Internet Browser, such as Internet Explorer, Google Chrome, etc...
Step 3:
Enter your Default Gateway in the search bar of your internet Browser as seen below and press Enter.

Step 4:
This will then display the Login page to enter your IP Phone username and password. The default factory settings for the username and password should both be "admin". Enter the username and password and click Login.
Step 5:
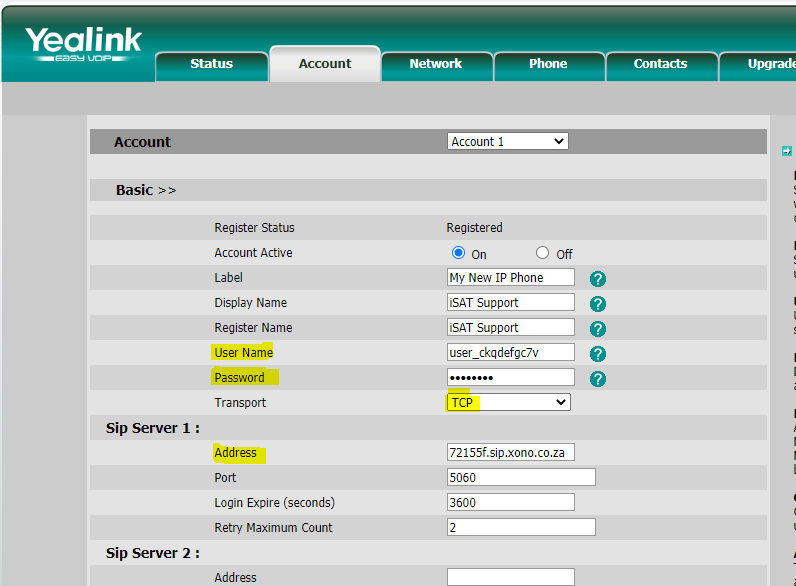
Click on Account:
Enter the following information received from iSAT as show below:
- Sip username
- Sip Password
- Sip server
Make sure that Transport is set to TCP
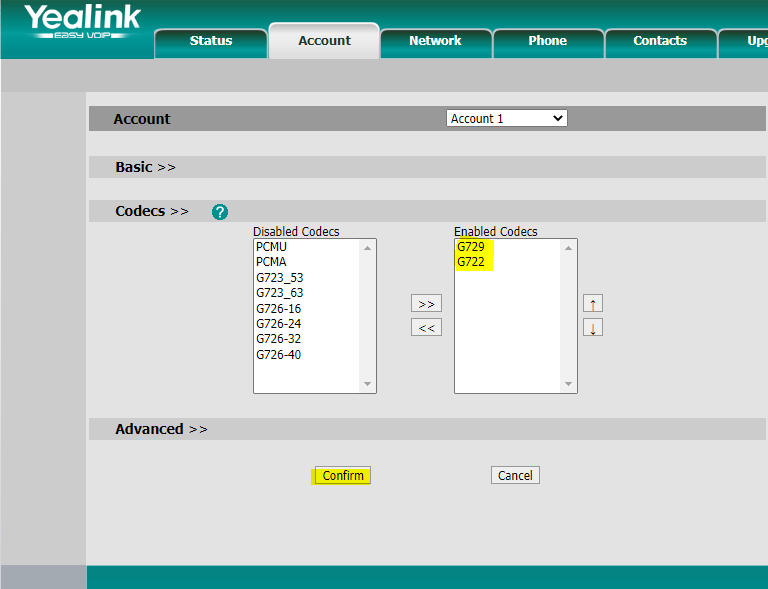
Step 6:
Once you have entered those details, scroll down and click on Codecs, Select the following codecs and click Confirm.
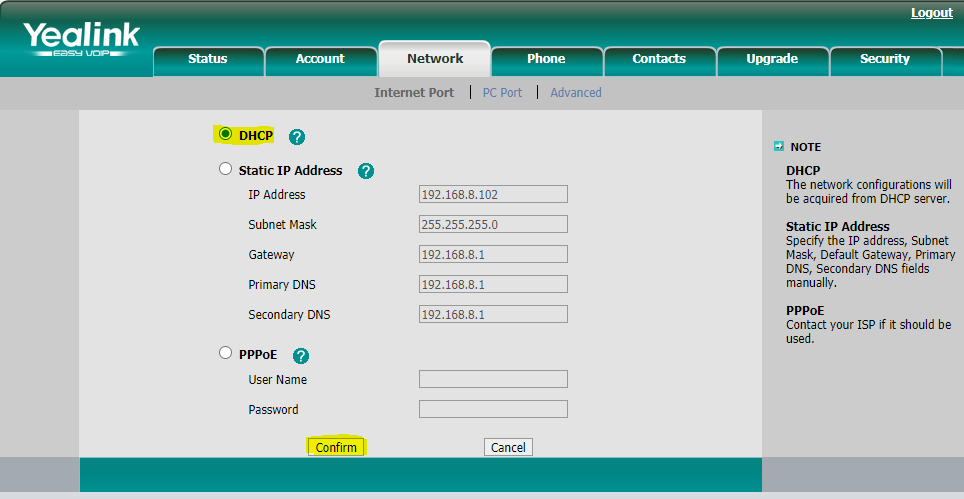
Step 7:
Click on the Network Tab, Select DHCP and click Confirm.
Step 8:
To make sure that your Username, Password and Sip server address have registered, click on the Status Tab
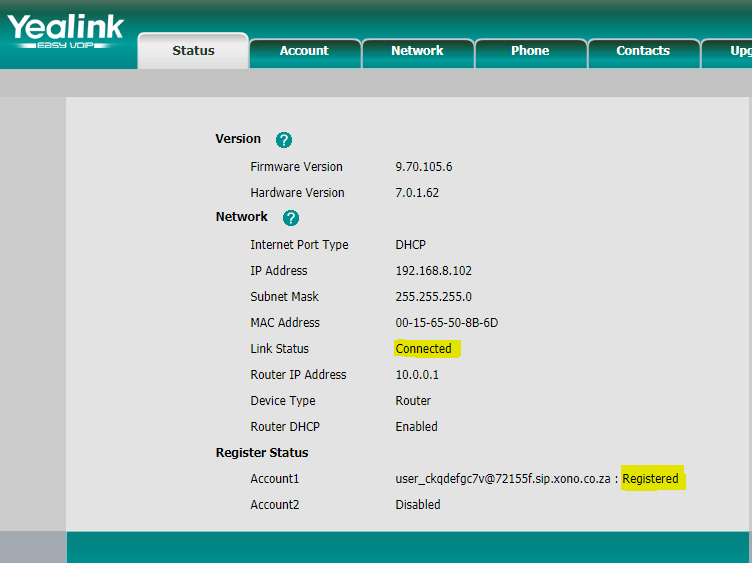
You will now be able to make and receive calls through your Yealink SIP-T20P IP Phone
Should you need assistance setting up your Yealink SIP-T20P IP Phone, please feel free to call us on 010 555 0650
Regards,
The iSAT Team
Back to top