How to Setup Wi-Fi on D-Link 2750U router
Back To Online Support
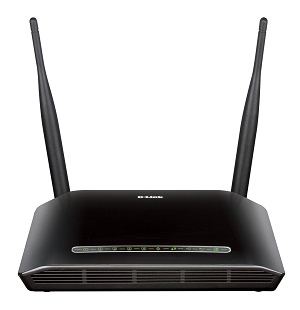 D-Link DSL-2750U Router
How to configure a D-Link 2750U Router Wireless settings
This guide will show you how to setup your D-Link 2750U Router for Wireless access.
Step 1:
Obtain you Default Gateway (for more information, see How to obtain your Default Gateway)
Step 2:
Open your Internet Browser, such as Internet Explorer, Google Chrome, etc...
Step 3:
Enter your Default Gateway in the search bar of your internet Browser as seen below and press Enter.

Step 4:
This will then display the Login page to enter your router username and password (See below image). The default factory settings for the username and password should both be "Admin". Enter the username and password and click Login.
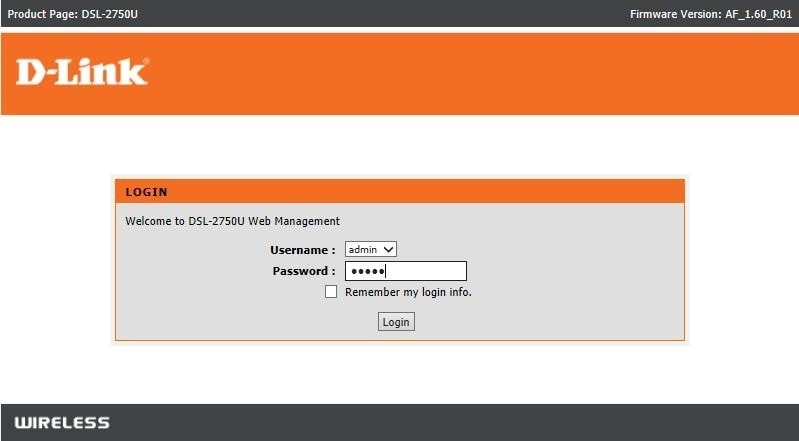
Step 5:
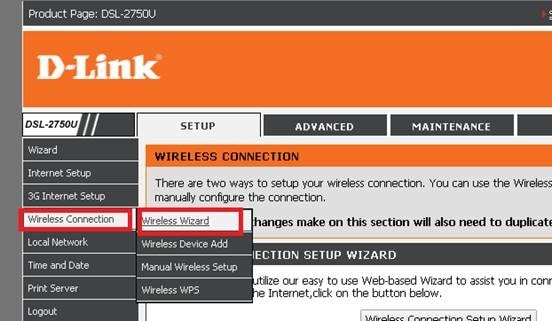
Click Wireless Connection and select Wireless Wizard.
Step 6:
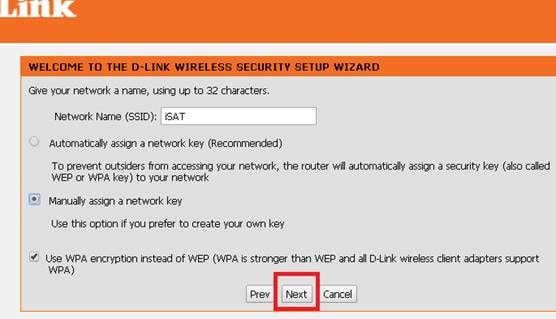
The below should appear. Set up your Wireless Network Name (i.e. John Home).
Follow the step below:
Step 7:
Enter a secure password (Network Key). Click Next
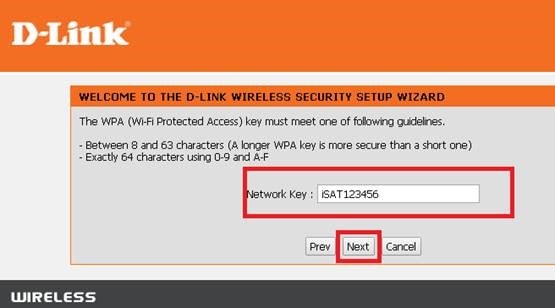
Step 8:
The below should appear. This is a summary of your settings. Click Save
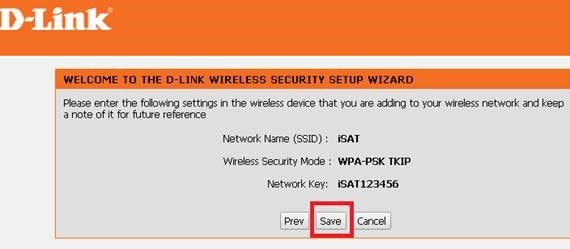
Once you click save a progress bar will be shown as seen below:

Manual Wireless Setup
Step 1:
Click “Wireless Connection” and select “Manual Wireless Setup”.
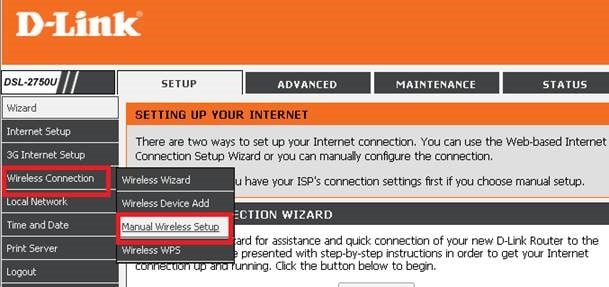
Step 2:
Select Wireless Basics

Step 3:
Here you can change your Wireless Network Name (SSID), Disable the Wireless or hide the SSID.

Click Apply once you are happy with your changes. The router will now update these settings.

Step 4:
To change the security settings of your Wireless. Repeat Step 1 and choose Security Settings

Step 5:
Scroll down the page until the below in in view.
Here you can make a number of changes including making changes to your Network security key (WPA Passphrase)

Click Apply/Save to Update these settings to the router.
Step 6:
Click logout to log out of the router.

Should you need assistance setting up your Wi-Fi network, please feel free to call us on 010 555 0650
Regards,
The iSAT Team
Back to top